November 5, 2013

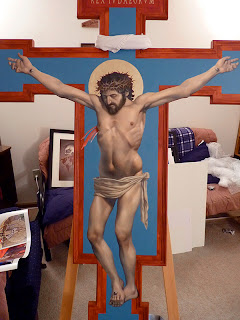
Crucifix Process 7

This will be the last process update until December, because the crucifix is hanging at the show for the month of November. The process photos are taken between Oct. 22 and 24.

On the last post, I showed the underpainting process. This post shows the glazing process. It's tempting to just show the photos that look like everything was going perfectly, but truth be told, the first day of glazing was a lot of frustration. In the past, I had used Liquin fast-drying medium as a painting medium. But I've since read that it starts to turn brown after only a few years, and I think I can see that happening already in the painting that currently hangs at Trinity Chapel.

So I did some searching online for a recipe for a more traditional glazing medium. The ingredients I saw most often were stand oil, Dammar varnish, and turpentine/mineral spirits. The first mixture I tried was far too sticky, and trying to modify it two subsequent times resulted in equally poor results. The photo below shows the first of three attempts, each of which I had to wipe off with mineral spirits. This is why it is important to wait until the underpainting is thoroughly hardened before glazing.


With the fourth attempt, I scrapped the whole batch of medium and mixed refined linseed oil with some mineral spirits and a small amount of Dammar varnish. The drying time I knew would be slower, but I didn't have the time to experiment for the perfect medium. Because I wouldn't have time for subsequent coats of color before the delivery date, I had to modulate the color on a single layer.


The underpainting on the face and loincloth were still tacky, so I had to wait two more days before glazing them. Otherwise, the first layer of color could have been completed in a day.



Oct 26 was the delivery date. Here it is riding comfortably in the back of my parents' van, on every blanket we own, and over top of the other framed artwork. Before I call the crucifix finished, it probably needs at least two more layers of color, and when that is dry, I'll finish gilding the frame. After everything has dried for a few months, the last thing I'll do is cover it with a coat of varnish.

November 3, 2013

Crucifix Process 6

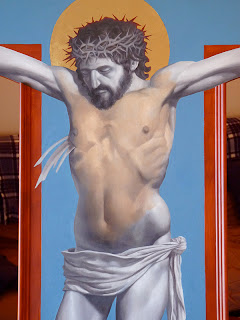
I'm long overdue for another update on the crucifix. These photos were taken between Oct 15 and 21, and they outline the entire underpainting process. Making an underpainting in grayscale goes back to the early Renaissance. Not long after oil paints had been invented, painters began to discover that one could paint the values (light and dark shades) of the form first, and then paint thin layers of color over the top, letting the underlying structure show through, and giving the body a luminous, life-like quality. It takes more time and effort than painting the figure alla prima, but the result, I think, is well worth it.


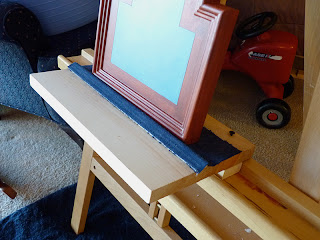
The first thing I had to do was build an extension to my easel, because the supports I screwed to the back made the cross too wide to fit onto it. I just screwed some scrap wood to it, and glued a piece of cloth to it just to give it some added protection. (I'm thinking forward to when there will be gold leaf around the edges.)

I began the underpainting by filling in the light and dark areas I had outlined in the cartoon with solid color, almost like a paint-by-number. When I had the values blocked out, I could then blend them together and refine the form. I painted one area of the figure at a time.


Reference is invaluable. Cloth is especially not the sort of thing that you want to invent when you're working at this scale and level of detail. It has a sort of structured chaos that is very difficult to fake. So even though I didn't have a body of Christ in front of me, I set up a sort of still life and photographed it in a few different lighting situations. I could then pick and choose details from either photo that were more interesting, or that seemed to work best on the figure of Jesus. The end result is much more convincing than it would have been if I had tried painting from my imagination.


The underpainting has to thoroughly dry before I can attempt to start glazing color over it. Every part of the underpainting except for the loin cloth had been drying for four days before I started glazing.