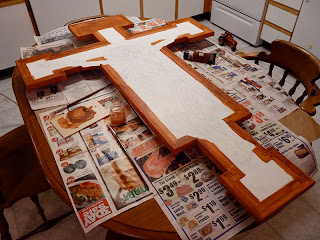
This batch of photos was taken on Oct 11-13. Between this post and the last, I had taken an awl and incised the outline of all the areas that would be gilded. This way I would be able to paint over the pencil lines and still have a clear guide as to where the metal leaf will go. All the areas that will have the metal leaf have to be painted with a red earth tone. Otherwise the metal will look cold and greenish when it is applied. I'm just using acrylic burnt sienna here.
Here I'm applying the acrylic base color for the visible portions of the cross. I pre-mixed a generous amount of this bluish color in a baby food jar, in case I need more of it. It's very difficult to match the same color again if you run out. I applied at least three coats of the blue, being very careful this time not to go over the incised lines.
If I hadn't inscribed the letters at this point, I would have no guide. But you can still clearly see the letters, even though they've been painted over with several coats of acrylic.
Since this is a model, I'm using the composition leaf I have on hand instead of real gold. In order to apply the leaf, I had to carefully apply the size (glue) to only the areas that would be gilded. This particular size has to dry for about an hour before the leaf can be applied. The tricky part was that it took almost an hour just to apply the size to the letters. So I couldn't apply the leaf all at once.
I cut the 5 x 5" sheets of leaf into smaller pieces with a knife on a leather pad. Using a fan brush, I picked up one piece at a time and laid it over the size. After all of the leaf has been applied, the excess needs to be brushed away. I started with a the fan brush, but it eventually required a brush with a bit more stiffness to it.
Afterwards, I repeated the same process for gilding the halo. Cleanup is surprisingly easy. You can just sweep up the loose bits of leaf with a soft brush, and the static causes them to stick to the bristles.
I had planned at this point to continue on and gild the frame and molding, but I feared it would take at least a week to finish, once I had started. I decided to skip gilding the frame until after the art show—finishing the painting is more important right now.


It looks gorgeous so far. I'm looking forward to seeing the finished product.
ReplyDeleteInteresting to see your value reduction lines on the figure. I hadn't thought of inscribing lines to preserve them. I think this kind of post is really interesting. Thanks for being so generous and thorough with your explanations.
ReplyDeleteGreatt read
ReplyDelete